| INDEX | 1300-1599 | 1600s | 1700s | 1800s | 1900s | CROSS-ERA | ETHNO | |
| MISCELLANY | CONTACT | SEARCH | |

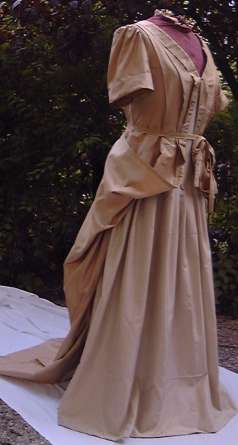
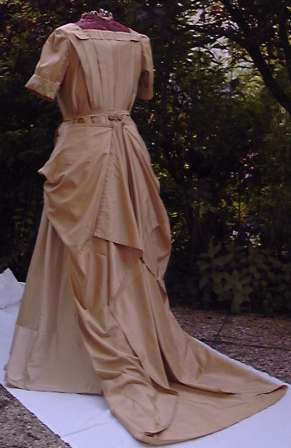
Pictures: front, back,
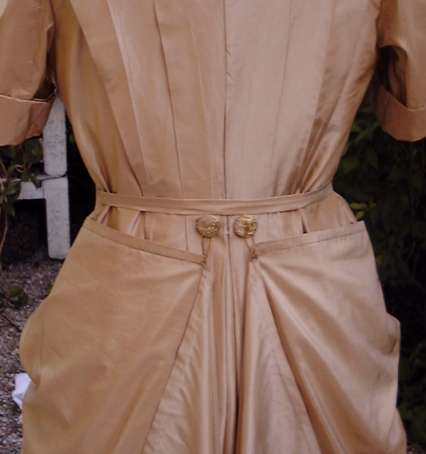
detail of back (yet without skirt support or
stomacher)
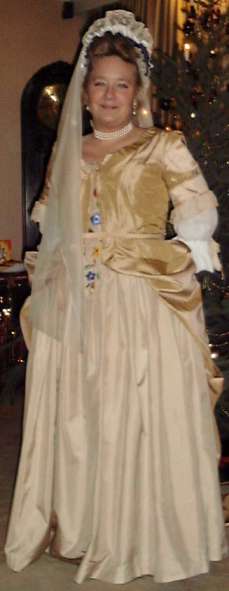
full costume with fontange
This is my piece of ambition: I wanted to make something decent out of decent fabric and with appropriate care for once. As was to be expected, it took me almost a year to complete, working off and on. Alls seams but for those of the lining are hand-sewn.
The pattern is loosely based on one by Jean Hunnisett with influences from Waugh. The main problem was that very few manteaux of this style have survived, and the only two I know of are both 1690s/1700s. The skirt was different then, as was the train. While the bodice was worn closed in front in the early and mid 1680s, often slightly opening towards the waist to show a small triangle of stomacher, it was later worn open so that an upside down triangle showed, just like in the 18th century.
The fabric is fine silk taffeta in two shades of sand - lighter for the jupe and corset, darker for the manteau. The same shade for both would have been more period, but here wasn't enough fabric of either one as I'd originally bought it for two different dresses. The stomacher will be of the same fabric as the jupe - it is currently being hand-embroidered in a design of flowers and leaves which I've pieced together from textiles at the V&A. The fine material calls for fine thread, so that will take a while. The bodice is lined with firm cotton.
Using the scarce image material I could find, I made the bodice closed over the breast and opening a little at the waist. The train was made as long as fabric would allow, with gores at the side for additional width. If you let the skirt down, the overskirt would be floor-length in back, gradually lengthening into the train, which has a rounded hem.
The jupe is about as simple as it can get: a length of fabric, about 3 m think, knife-pleated onto a waistband long enough to tie it in back. This is actually my standard procedure for skirts: simple and allowing for changes in stature. The jupe is slightly longer than floor length to allow for high heels.
The first challenge were the bodice pleats: They are not the same depth at the top as at the bottom, so getting them to lie straight without creases was one big job. I managed eventually but made the mistake of ironing them down before I was 100% certain they were right. The silk didn't like that - now the old fold marks won't go out of the fabric.
I never got it figured out how the pleat at the front edge was meant to be made - you know, the one you also get in the 18th century, name of "robings" (IIRC). Hunnisett, in the single closed-front picture, makes it look real simple, with the stripes (i.e. the grain) following the angle of the front edge, but fabric just doesn't bend like that. So I took a magnifying glass to my few little pictures again and deduced that this alleged pleat had been made up as a separate strip. Where the front edge angles out towards the shoulders, it would have to stick up a little - I put lack of evidence of that down to (a) artistic liberty, (b) small scale of the pictures or (c) the strips being made not straight but to shape (but then how can stripes follow the direction??). I just made a strip, attached it, and held the sticking-up corners down with a few stitches.
Challenge number two was the seams and hem of the overskirt. The hem is for the most part diagonal to the grain or rounded - both are a pain to sew. It's a bit easier by hand. I've turned a narrow hem of 1 cm, getting even narrower in the rounded section where it rather resembles the rolled hems of silk scarves. Another consideration was that as the train is folded up, the inside becomes the outside, so the hem would show. There's only one thing you can do: Make the hem as neat as possible. They did line the skirts sometimes, but I was too lazy and shied from the added weight. After all, they weren't hiding stitching as ashamedly as we do now.
Same problem with the side seams of the skirt: The top part is made with the allowance inside, then it is turned and the allowance is outside - which, when the train is folded up, is hidden. But from what point on is it hidden? To determine that, the next task was to determine the fall of the train in back. Which leads to challenge #3.
You can have the "waterfall" fold back and forth as often as the fabric allows, but each turn places your side seams in danger of being exposed - the allowance may have to be turned back inside again, but from which point on? You can only tell when the train draping is finished. In some places, I have turned the allowances face to face and basted them together to hide the rough edges in case the drapery would change position when I moved.
An added complication was that however much I tried, I couldn't get the look of the sides of the folded-up skirt to resemble the pictures either in Hunnisett's book or period engravings. The portion where the front edges angle away from front of the waist, round the sides and towards the small of the back lies so very smoothly round the hips in the pictures, but all I got looked like two big baskets on either side. It's possible that the artists lied again, "retouching" as it were to show a more graceful line. Or maybe the taffeta, which hadn't been washed beforehand, was stiffer than period materials. Careful draping can take care of the problem, but only if you don't move much when wearing the dress.
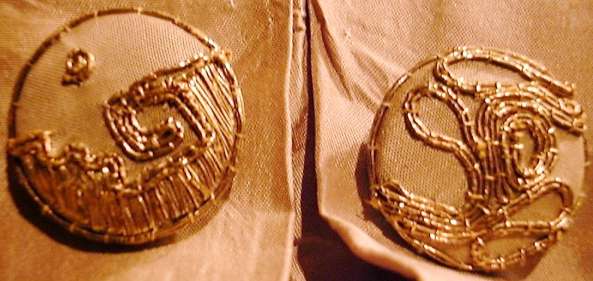
Comes challenge #4: How is the train fixed in back? I know it involves buttons and loops, but what did the buttons look like and how are the loops fixed? In a Hunnisett picture I see the buttons just about showing. I took two matching wooden buttons from grandmother's spare button tin box and covered them in the same silk the manteau is made of. Then my creativity went amok and I embroidered the buttons with vintage real-gold couching thread I'd found at a flea market. One got a fantasy design of winding thread, the other the much more complicated design of my Aztec-inspired device which I have used to sign my drawings and paintings since my high school days. I view my selfmade garments as artistic expression in just another technique, so I've always put labels with this device and the year of creation into the garments I've made. It's a deviation from pure historical accuracy, but my creativity is part of my costuming, so to hell with it.... The loops were made of the same gold couching thread made into cords. I used the portions where the gold had all but rubbed off for that.
Content, layout and images of this page
and any sub-page of the domains marquise.de, contouche.de,
lumieres.de, manteau.de and costumebase.org are copyright (c) 1997-2022 by Alexa Bender. All rights
reserved. See Copyright Page.

GDPO


This work is licensed under a Creative Commons License.