| INDEX | 1300-1599 | 1600s | 1700s | 1800s | 1900s | CROSS-ERA | ETHNO | |
| MISCELLANY | CONTACT | SEARCH | |
This is to illustrate how you can obtain additional co-ordinates for a boxed pattern beyond those given in the original pattern.
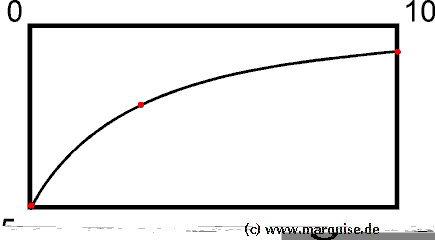
Let's assume you have a pattern part drawn into a box of 5 x 10. There is a curved line and you don't dare to draw it free-hand with just the two end points and the zenith (picked out in red) to go by.
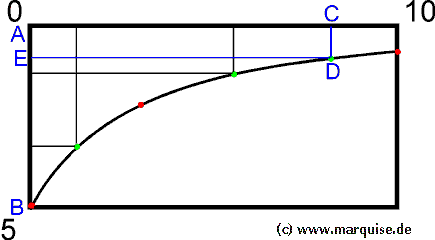
You know that A-B (blue letters) is 5 cm in reality because the pattern says so. On your printout, it's, say, 3 cm. So the ratio is 3 (pattern)/5(reality) or 0.6. Mark off as many "helper points" as you like along the curve (picked out in green). Now measure their respective distances from the axes (i.e. the lines outward from point zero, at right angles), e.g. the blue lines C-D and D-E. If in the small pattern C-D is 1.5, it must be 2.5 in reality (1.5 divided by 0.6). Same for D-E or any other distance you get: divide them by the ratio and you get their real-life values.
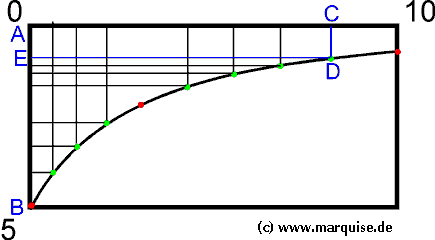
If you put the values you've got into the original-sized box you've drawn and go on and on, you eventually get a line of dots that's very close to the actual shape of the curve. You can do that for as many points as you think sensible, but bear in mind that those old patterns are never quite exact: Sometimes it's better to boldly draw a curve that looks correct.
Content, layout and images of this page
and any sub-page of the domains marquise.de, contouche.de,
lumieres.de, manteau.de and costumebase.org are copyright (c) 1997-2022 by Alexa Bender. All rights
reserved. See Copyright Page.

GDPO


This work is licensed under a Creative Commons License.